
Your images and other visual assets are in a mess right now. You know it’s time to implement a DAM; you even have a clear picture of what your beautiful, on-brand and organised library of approved visual content will look like.
But how to get there?
If you’re purchasing a digital asset management solution, we’re sure you’ll want to know exactly what’s going to happen once you sign up. How long will it take to get set up? How do you start preparing your files ready for import? How should you structure your folders and metadata fields?
Don’t worry - we’ve got you. Here are the steps you can expect after you decide on a DAM solution, along with tips for a smooth setup:
- Get an overview of your new DAM
- Collect the images and videos you want to upload
- Prepare your folder structures and fields
- Upload your visual content
- Sort out upload workflow and permissions
- Brand up your DAM
- Invite your team
- Start deploying your assets 🚀
1. Get an overview of your new DAM
First things first - you need to know how your DAM feels.
It’s really as simple as that. Depending on the DAM tool that you choose, you may have gone through a demo with a product representative, or you may have already signed up for a free trial (like you can with Dash). It’s also important to note that free trials are a standard part of the process for most SaaS solutions these days - most DAMs on the other hand, still don’t offer them - that’s where we want to change things with Dash. We want to give you the opportunity to play around with the system for yourself - rather than sit on a call with a salesperson.
This is the time to dive in, click around - just take it all in. You might not have many assets to look at yet, but discovering your admin settings and navigating around the platform will give you a feel for the new system. (Here's a glimpse of our DAM tool, Dash. 👇)
%2520(1).jpeg)
2. Collect the videos and images you want to upload
What’s a DAM without its assets? A pretty sparse one...
This is the time to start getting your gorgeous brand snaps and videos ready for upload. This could be the opportunity to start afresh. There’s nothing better than a good old purge of all your outdated assets. You don’t have to bring anything over that you don’t need anymore.
✨Tip: If you’re not sure where to start, how about gathering all your important branding files? That’s logos, brand guidelines, graphics and content guides. All the things that make up the bones of your brand.
3. Prepare your folder structures and fields
Folders and fields are the vital starting blocks for a well-organised DAM solution. Let’s dig into each.
Folders
Folders are where all your assets can be split up and categorised. Say you have lots of marketing content, but want to organise them into different channels. That could be email, social media and ads. Or you could organise them based on different campaigns through the years. Take RJ Living's Dash as an example:
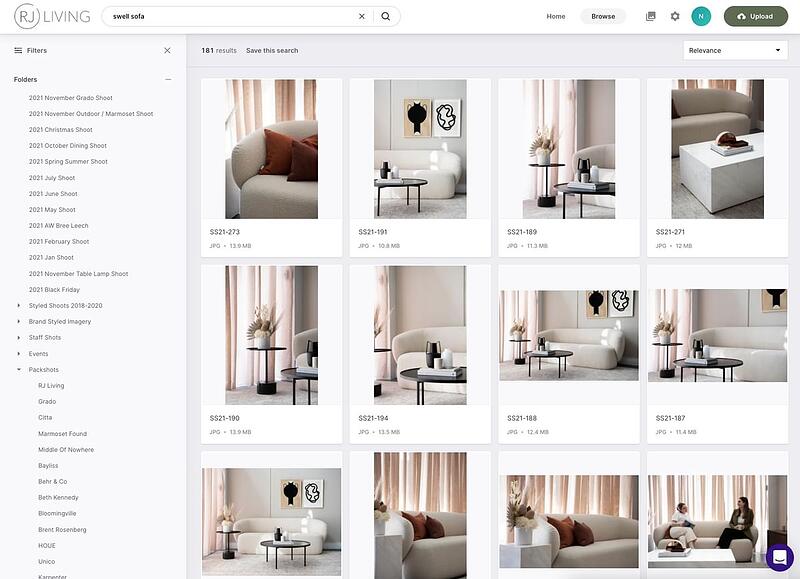
Here you can they've organised folders based on different photoshoots throughout the year. They've also made use of sub-folders to help them search various collections.
✨Tip: You can delve into as much, or as little detail as you like. But it’s important to get input from some of your key team members who’ll be using the DAM, so you make sure you’re setting up folders in a way that makes sense for everyone.
Perhaps you and your team can look at your current folder structures. Whether you’re using Google Drive, Dropbox or shared drives - reviewing what you already have is a quick way to get started. However, often those structures contain a lot of duplication. With a DAM solution, you’ll eliminate this as assets can be in more than one folder at once. You can also use fields to avoid replicating subfolders.
Fields
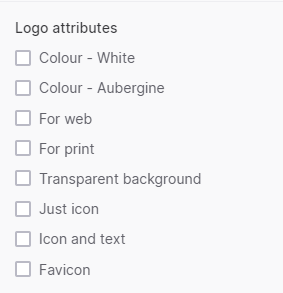
Fields of information get attached to your images and videos. Think of them like labels. You could have a caption, description, expiry date, tags, file type, photographer - the list goes on. Take a look at some of our fields that make searching the different variations of our logo even easier:
Combined with your folder structure, you’re set for a super-searchable DAM that even a toddler could navigate.
Feeling a bit lost with all the DAM lingo? Take a look at our glossary of DAM terms. 🤓
5. Upload your visual content
Now you’ve gathered your assets and you know what folders and fields you want to use, it’s time to start uploading your content.
How you do this may vary depending on how you’re currently storing your assets. If you’re switching over from a cloud tool such as Google Drive or Dropbox, the process will be pretty simple. All you’ll need to do (if Dash is your chosen DAM tool) is populate a folder with all of the images and videos you want to move over. Then, simply get in touch with our team and we’ll do the rest for you.
If you’re moving from another DAM, or you’re taking things from your own desktop, there may be different steps involved. It’s best to check in with your chosen DAM vendor to find out how they can help you. In any case, there’ll always be expert guidance along the way.
6. Sort out upload workflow and permissions
You’ve uploaded all your visual content. You’ve populated your folders and assigned your fields. Time to sit back and relax?
Not quite!
One of the biggest issues with shared drives and network servers is the freedom that people have to upload and download whatever they want.
If you’ve got a team of photographers uploading 100 + product shots from a recent shoot, things can get a little hectic.
Enter - permissions. 🙌
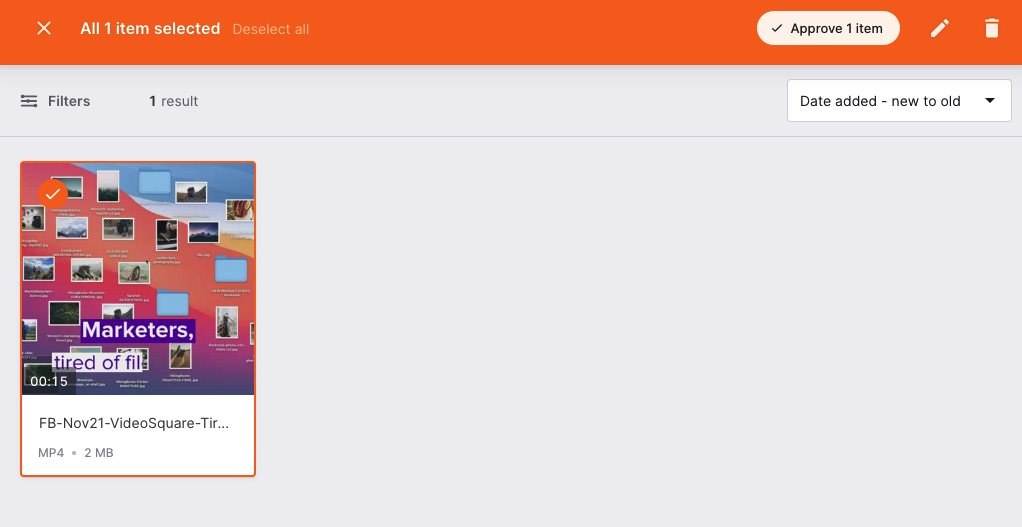
In Dash, you can set different upload permissions for your teams and freelancers. So, if a photographer wants to upload a series of images, you can approve or reject the ones you want.
If we go back to folders, you can actually set up specific permissions so that only certain people or ‘groups’ can access them. This means you can ensure your DAM stays organised and team members can quickly get to the files they need.
✨Tip: It’s important your team members understand the new workflows before they upload their assets. Instead of dumping files into Dropbox (which they might be used to), they’ll need to organise them on upload. This will mean tagging and filling out any mandatory fields that you choose to include. This may sound like it’ll take longer than just casually uploading into a shared drive, but trust us, it’s going to pay off big time when people need to find their files again.
7. Brand up your DAM
With the above points complete, it’s time for the fun stuff. 🎉 Many DAM providers will be able to create a platform that looks and feels like you.
This means that whenever your team members or external freelancers and agencies log in, they’ll feel like they’re stepping right through your brand’s front door and into a palace of gorgeous visuals and inspiring content.
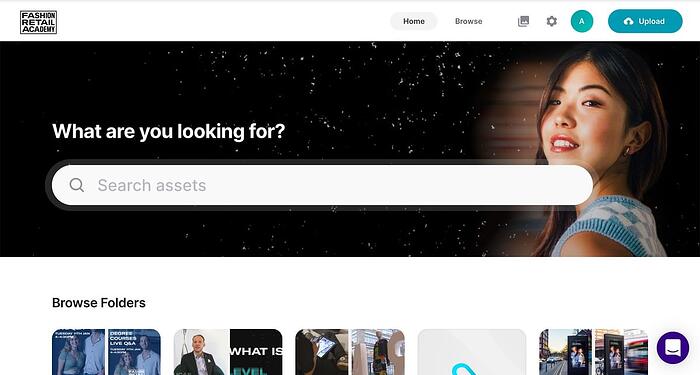
In Dash, you’ll have the ability to start customising and applying your theme right away. You can simply head into the settings, go to ‘theming’ and add your brand colours, upload your logo and change the login background image. It’ll feel like yours in no time!
Here's a look at Fashion Retail Academy's branded Dash. 👇
8. Invite your team
The final - and most important - step, is to invite your team. Hurray!
Whether you’re giving full admin access to your marketing team or view-only access to your boss, it’s time for your new DAM to shine. ✨
If you’re an admin (and we expect you will be if you’re reading this post) you’ll have the ability to add users in your settings.
Your teammates will get an email notification that’ll invite them to get stuck in.
Next steps: time to deploy your visual content
So, there we have it. Now you’re all set up, you can saunter off into the sunset and continue your brand’s journey by deploying all those gorgeous visuals from your DAM.
No more time spent trawling through shared drives. You’ll open up a world of creative opportunities now that you can push your visual content out with a click of a button.
Want to try out a DAM for yourself? Download our free digital asset management software comparison worksheet.
Or grab your free 14-day trial of Dash below!

Amy Burchill is the SEO and Content Manager for Dash. She works with ecommerce experts to create articles for DTC brands wanting to improve their campaigns.

